Sunday, December 22, 2013

Will I ever stop being such a perfectionist?

This is the type of photo that annoys me to no bounds:

(ISO 6400, f/4, 1/60 sec.)

It annoys me because I know full well not to go to high ISO speeds!  If you look at this photo in larger format, it is quite grainy due to using the high ISO ("noisy" is the technical term.)  But I kept the camera in auto ISO mode and didn't even think about what it would do to the ISO.  *grumble.*

That said...will I ever get over myself?  Yeah, it's not magazine quality, but it was a beautiful sunrise in Albuquerque, and this picture captures the sky colors quite well.  This is where my left brain needs to stop beating up my right brain already.  As my friend Michelle said, what counts is that the photo captures a memory of a great moment.  And I've learned a valuable lesson for the future.

An aside:  if you haven't been to Albuquerque and love beauty, it's an awesome city to visit.  This is my new laptop wallpaper:

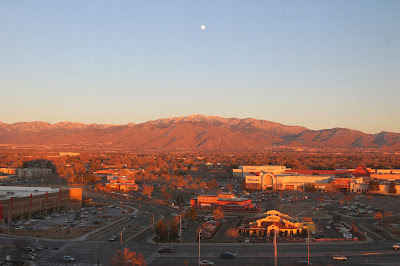
(ISO 100, f/5.6, 1/80 sec.)

As you can tell by the moon in the shot, this was taken in the hour before sunset, often called the golden hour due to the way the sun casts an almost gold-ish color on things.  It is a great time to get shots!  (The hour before sunrise in the morning has a similar effect, but I'm rarely up that early. :)

The photography adventure continues...

Tuesday, November 5, 2013

Using MATLAB to improve an image

(Warning: this post gets technical.  You do need MATLAB knowledge to get the full understanding, but even if you don't know MATLAB, the process is still hopefully straightforward, even if the code isn't.)

I was sitting at the Burlington Mall the other day and I saw a beautiful scene with some deep red trees and a sky with some matching red in it.  So of course, I took out my camera and this is what I got:


(ISO 6400, f/5, 1/60 sec.)

Umm...that didn't work as it totally blew out the sky, probably due to using spot light metering, with the spot being on the tree.  So instead, I tried spot metering on the sky, and this was the result:


(ISO 250, f/4, 1/40 sec.)

That's not too bad, but the red of the trees is darker than I'd like.  In retrospect, that's what HDR is for, but that didn't hit me on the spot.  So when I got home, it became my goal to bring out the red of the trees while keeping the sky at its current brightness.  I started with the second image since the sky was just totally blown out in the first.  Here we go:

Step 1: Crop and Rotate

The image is obviously slanted and I really don't care about the cars or the empty tree on the right.  While the Image Processing Toolbox in MATLAB has some functions that can crop and rotate an image, Canon's Digital Photo Professional has a nice simple GUI to do both those actions, so I went there, and here was the result:


Step 2: Convert to gray

How do I separate the trees out?  What makes them different from the sky? It's how bright they are (or aren't).  To segment (which is a fancy word for separate into different parts) an image based on intensity values, it's often easiest to convert to grayscale, and now the MATLAB and Image Processing Toolbox part begins:

>> I = imread('redLeaves.jpg');
>> Igray = rgb2gray(I);
>> imshow(Igray)


Step 3: Determine the threshold value

Once an image is in grayscale in MATLAB, the pixel values go from 0 to 255 (0 is black, 255 is white) and the goal is to figure out the "threshold" value T, i.e. the value where the pixels whose values are less than T are trees and the pixels whose values are greater than T are the sky.  To do this, I looked at the image histogram:

>> imhist(Igray)


Long story short, the peaks are values that appear more times in the pixels of the grayscale image.  In the grayscale image, there's a pretty clear delineation between the the dark and the bright, and the two peaks in the image histogram seem to confirm this.  So a good threshold value may be 50 as that's a bit beyond where the first peak ends.  How good is that value?  Well, let's convert this image to black and white to see which parts are greater than 50 and which parts aren't.  I want the trees to show up as white in this image for simplicity, so:

>> Ibw = Igray<50; % less than so that the trees are white and the sky is black
>> imshow(Ibw)


A lot of stuff is showing up as "tree" here, so let's try different values of the threshold:

>> T = 50:-5:10;
>> for ix=1:9
Ibw = Igray<T(ix);
subplot(3,3,ix)
subimage(Ibw)
title(['Threshold = ' num2str(T(ix))])
end

It's harder to see at this smaller size, but on a larger monitor, the tree starts to disappear even at a threshold value of 45, so we'll stick with 50.

Step 4: Find the pixels that are below the threshold

Now that we've decided a threshold value, we need to find the locations of the pixels that are below the threshold value.  We could write a for loop but we don't need to.  Instead, just a simple find command:

>> [r,c] = find(Igray<50);

The result will be a vector of rows and another vector of columns; their combinations are the pixels less than 50.  For example, r(1) = 367 and c(1) = 1, which means the 367th row and 1st column is a pixel whose value is less than 50.

Step 5: Brighten it!

Well, now that we know the locations of the pixels to brighten, let's brighten them!  I'll use a simple algorithm which multiplies the intensity of each pixel by 2.  Of course, we need to do this across the R, G, and B value of each pixel.  For example, to do this at the 367th row and 1st column, you would use this command:

>> I(367,1,:) = I(367,1,:) * 2;

Except of course we need to do this across all the pixels found in step 4, so for that, we will use a for loop:

>> Ibright = I; % Just so we're working on a backup copy
>> for ix=1:length(r) % Or length(c)
Ibright(r(ix),c(ix),:) = I(r(ix),c(ix),:) * 2;
end
>> imshow(Ibright)


Not bad! Let's look at three images now:  the original, the image with the dark areas brightened by a factor of 2, and the image with the dark areas brightened by a factor of 3:

And there you go.  With the brightening factor of three, it almost starts to look cartoonish, and the lamp posts get all yucky too.  

Next steps

It was 12:30 AM when I finished the above, so I went to sleep :).  But the next thing I'd try to do is to get rid of the light posts using some kind of ROI (region of interest) processing (using the ROIFILL function?) and come up with a better brightening algorithm besides a simple multiply by a constant.  Any suggestions?  What would you do here?

Tuesday, October 29, 2013

Story of a Shot: The Golden Gate Bridge in fog

One feature I hope to make a regular occurrence on this blog is "Story of a Shot," which isn't just a picture and the technical aspects of that shot, but the story of how the picture came to be.  The first installment is going to talk about the shot that started my interest in the artistry of photography, which is the shot above, taken Friday September 23, 2011 at 4:16 PM Pacific Daylight Time.

Technical details


Camera: Nikon Coolpix 9100 (Point and Shoot)
ISO 800, f/9.0, 1/1250 sec.

Of course, the camera was in auto mode at the time.

I shouldn't even be here!


I wasn't even supposed to be in San Francisco that afternoon!  About two months before this, my colleagues had been working on setting up a training with a company in San Jose.  Originally, it was supposed to be a 5 day training, but the company wanted it during a week that I wasn't available on Monday; due to the content of the training, I was the only person who could deliver the class.  So we proposed two options to the customer: a cut down 4 day version of the training during that week in August or move the training to September when I could give all 5 days.  The customer selected the September 5 day version...or so we thought.  It turns out when I arrived, I start by showing the 5 day outline and of course I get lots of questions saying they were expecting a 4 day training.  D'oh!  Several of the students were traveling that Friday so we had to do the 4 day version, and it was cheaper for me to stay an extra day rather than change my flight back on such short notice.  An extra day in the Bay Area?  Darn.

Driving up to San Francisco


I needed to be in Oakland by 5:30 PM or so to meet a friend for dinner.  I've done the San Jose to San Francisco drive many times, usually on I-280, which is a beautiful drive in its own right, but since I had all day, I decided to take the long way there by heading to the coast and driving up the Pacific Coast Highway:

http://goo.gl/maps/2fz8y

There were of course plenty of great pictures from the drive like these:

A sign on a rest area on I-280

Once on the Pacific Coast Highway, the drive was like this--in and out of fog


A Taco Bell you can walk to directly from the beach in Pacifica!


Can you feel the excitement coming?

At the Vista Point

By the time I got through San Francisco and crossed the Golden Gate Bridge, it was around 3:30.  I was originally planning to drive straight to Oakland but I was ahead of schedule and so I stopped at the Vista Point just after the bridge and saw one of the weirdest things I'd ever seen:  fog pouring into the San Francisco Bay from the Pacific Ocean.  (All these pictures were from the same Nikon Coolpix S9100 camera set in auto mode.)


Fog was moving from right to left across the bridge
This is where the fog was coming from


Of course, if you were looking in a different direction from the same Vista Point, there was no fog at all!

San Francisco across the Bay from the Vista Point, or at least what you can see of it.
I knew I wasn't satisfied with the shot of the bridge on the left above, and I saw people on top of the hill, so I figured out how to get up there thanks to a map on the Vista Point.  That's where I got this shot:


When I got back from the trip and posted these to Facebook, I actually said this was my favorite shot as I liked how the curve of the suspension cables and the bridge tower look like they're coming out of the hill.  But then as people started "liking" my pictures, this one was the most liked:

This is, of course, the shot this entire post is about, and as I mentioned before, this is the shot that ended up getting the ball rolling on my love of photography.  I wasn't even trying to take this shot; I just happened to. But it's just so San Francisco with the fog and the bridge standing through it all.  I also love how this photo and really all the photos I took that day tell a story, a story of a drive I wasn't even supposed to to take, but like so many times in my life, God put me on for a reason, even if I had no clue at the time what that was. (Heck, I still don't know where the journey leads, but I know God is putting me on a good one!)

By the way, if you want to see all the pictures from that trip, here they are:

https://www.facebook.com/media/set/?set=a.10150842774250160.746340.785065159&type=1&l=8d56c3355a

This should work whether you're on Facebook or not.

Saturday, October 26, 2013

Welcome to my blog!

Welcome to The Nervous Photographer! This blog is dedicated to my adventures in photography.  In particular, I'm an "NF" personality type (INFJ to be exact), which means in some sense that I can be an emotional person and that I often, though not nearly as much as I'd like, understand my and other people's emotions and why we do what we do. So this blog will be both about the technical side of photography and also about the emotional side of it, especially my emotions. And of course it will feature photos. Now a bit about me.


How did I get into photography?


I've been traveling for work since 2005, but I only occasionally took pictures at first; I didn't even get my first digital camera until the end of 2006. At that point, it was more about snapshots; for me, true photography started with the photo of the Golden Gate bridge you see in the background of this blog and just below this paragraph, taken September 23, 2011.

The bridge shines through the fog!

I'll tell the story of this shot later, but it was looking over the photos I took that day that something sparked in me. This in particular feels like San Francisco to me. There's fog, but cars are still going through and people aren't letting it get in their way. That's so like San Francisco; between geographical challenges, not exactly pristine weather, and earthquake fault lines, they built one of the most beautiful cities in the US. This is one thing I long to do with photography; I want to tell stories like this and capture some of the beauty God has placed in this world.

Shortly after taking those photos in San Francisco, I got fed up with my point and shoot and when it stopped working entirely, I decided to go headfirst and get my first DSLR, the Canon Rebel T3i, in April of 2012. I also took a class on things like ISO, aperture value, and shutter speed, and then it was time to get to work. I'll be writing more about my photography history after getting a DSLR as time goes on.


What makes me nervous about photography?


Why is this blog called The Nervous Photographer? Well, it's certainly not because I get nervous every time I press the shutter button. It's more about the fact that I'm an engineer and have always valued precision. Things have a right or wrong answer; either the cell phone network works or it doesn't. Photography is a jolt to the other side of my brain which has always wanted more time, but I've pushed it down because of the lack of precision. And that's what makes me nervous about this hobby--how do I know if my photos are doing justice to the beauty I see? Can I really trust a "feel?" Can I trust my "feel" to be "good enough?" What does that even mean? I also get nervous about where this hobby may be going in my life--will it be more than a hobby? How much time should I put into this while still doing my job as unto the Lord, running a board game group, and other things? I've never been good at the concept of moderation; once I commit to something, I go headlong into it. Maybe I should just enjoy the ride. I hope you'll enjoy it with me!